
How to Grow Tomatoes From Seed to Harvest
Growing your own tomatoes is one of the most rewarding gardening experiences. There’s nothing quite like the taste of a sun-ripened tomato fresh from your own garden—sweet, juicy, and packed with flavor. Whether you’re working with a large backyard, a raised bed setup, or just a few containers on a patio, tomatoes are a wonderful crop to grow at home. With a little care and planning, you can enjoy a bountiful harvest that makes all the effort worth it.
This year, we grew our tomatoes from tiny seeds all the way to the first juicy bite, and we’re sharing what worked for us every step of the way—from seed starting to the final harvest.
Starting Seeds Indoors
We started our tomato seeds indoors about 6 to 8 weeks before the last expected frost date. Getting a head start indoors helps extend the growing season, especially in regions with shorter summers. Some gardeners swear by seedling heat mats, which help maintain a steady warmth for germination, but we opted for a more budget-friendly solution: a space heater in the room. On chilly nights, turning it on for a few hours kept the seeds warm and cozy, and we had excellent germination.

We used Jiffy seed starting trays with a Natural & Organic Seed Starting Soil Mix, which has a fine texture perfect for delicate seedlings. We planted each seed about ¼ inch deep—tomato seeds don’t need to be buried deeply to sprout.
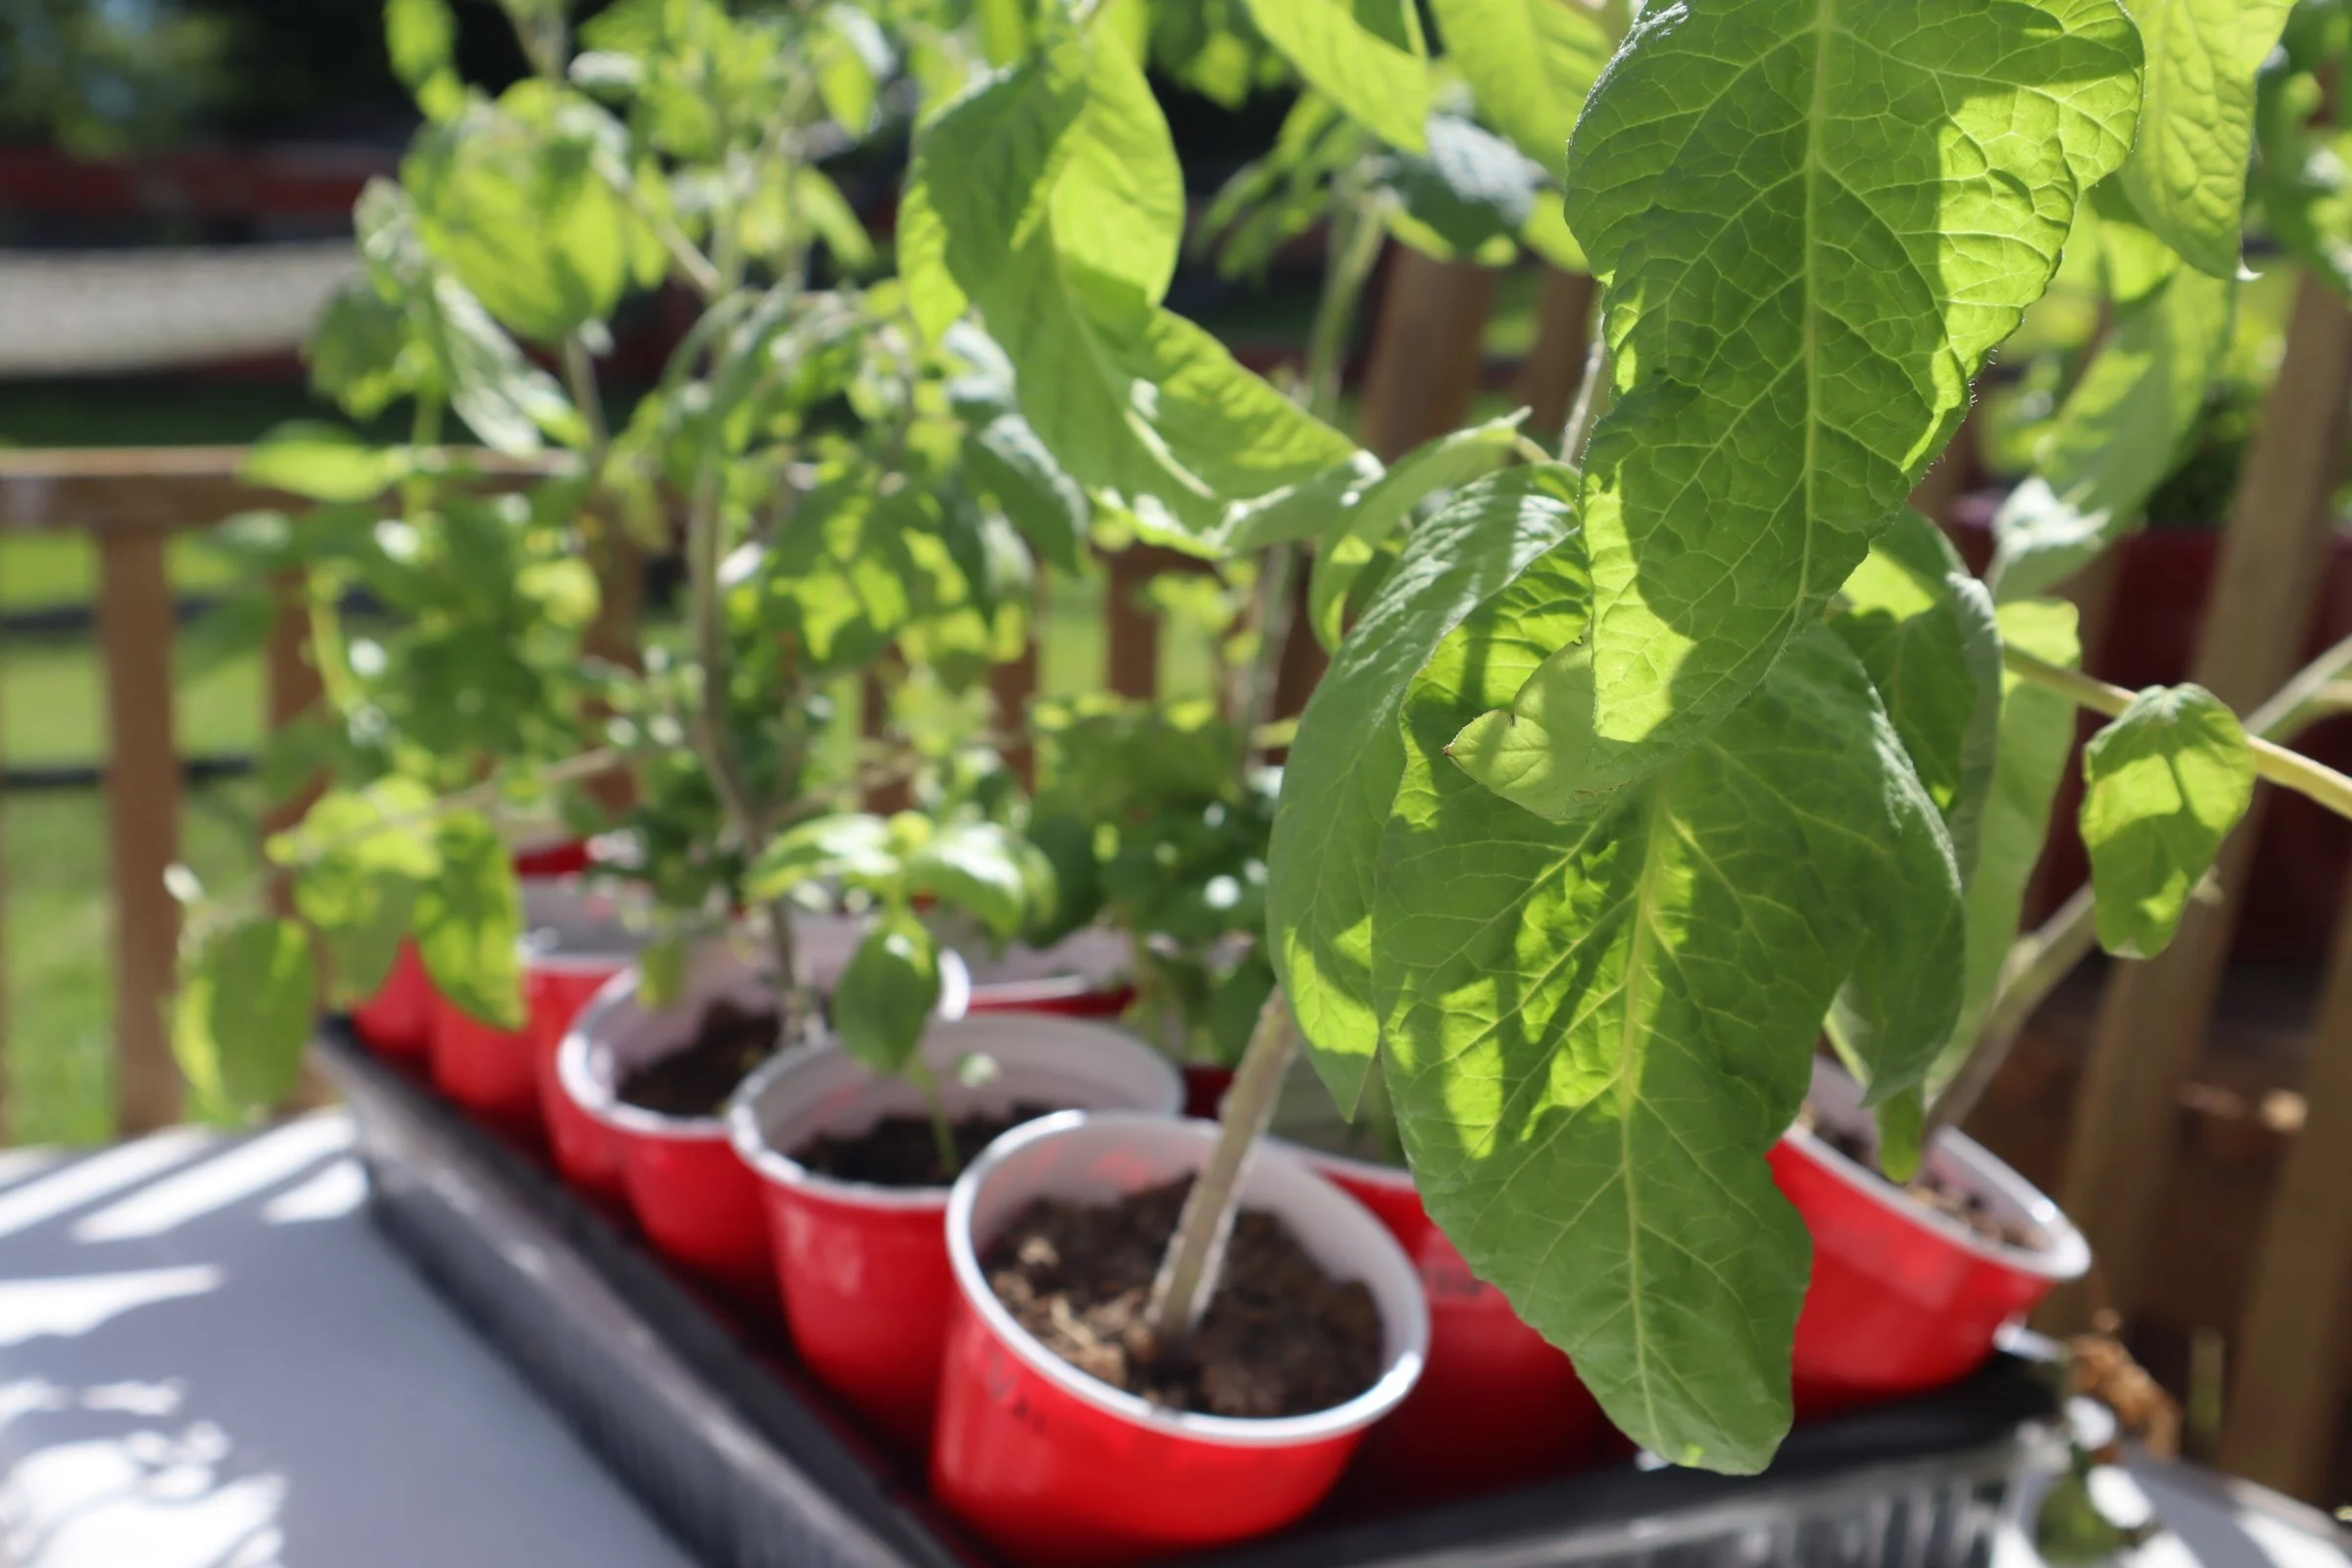
Once the seedlings emerged and developed their first set of true leaves (the second set that grows after the initial seed leaves), we transplanted them into red Solo cups. It’s a super easy and inexpensive way to give each plant more space. We poked holes in the bottom for drainage and labeled each cup with the variety planted.
Giving Your Seedlings the Right Light & Warmth
Tomatoes need plenty of light—at least 14 to 16 hours per day—to grow strong indoors. Without enough light, they’ll become leggy and weak. We used a basic full-spectrum LED grow light on a timer and positioned it just a few inches above the seedlings, raising it gradually as the plants grew. A sunny window alone just doesn’t cut it in early spring, no matter how bright it seems.

Warmth is just as important as light. Tomatoes like it cozy—ideally around 70–75°F during the day and not much cooler at night. The combination of consistent light and warmth helped our seedlings grow thick stems, deep green leaves, and strong root systems.
Transplanting to Larger Cups
As the plants grew taller and started to outgrow the red cups, we carefully transplanted them into larger containers to keep their roots developing. Each time we up-potted, we buried a little more of the stem—tomatoes are unique in that they can grow roots all along the stem when buried, which helps them grow stronger and more drought-tolerant.
This step also helped prevent the plants from becoming root-bound and kept them happy while we waited for the outdoor temperatures to rise.
Hardening Off: A Must-Do Step
One of the most important steps in transitioning tomatoes to the garden is hardening off—gradually introducing the indoor-grown plants to the outdoors. Skipping this step can cause transplant shock, sunburn, or even kill your plants.
We started by placing the seedlings outside in dappled shade for an hour or two, then gradually increased their exposure to sun and wind over 7 to 10 days. By the end, they were spending full days outside and were well-acclimated to their new environment.
Choosing a Planting Spot
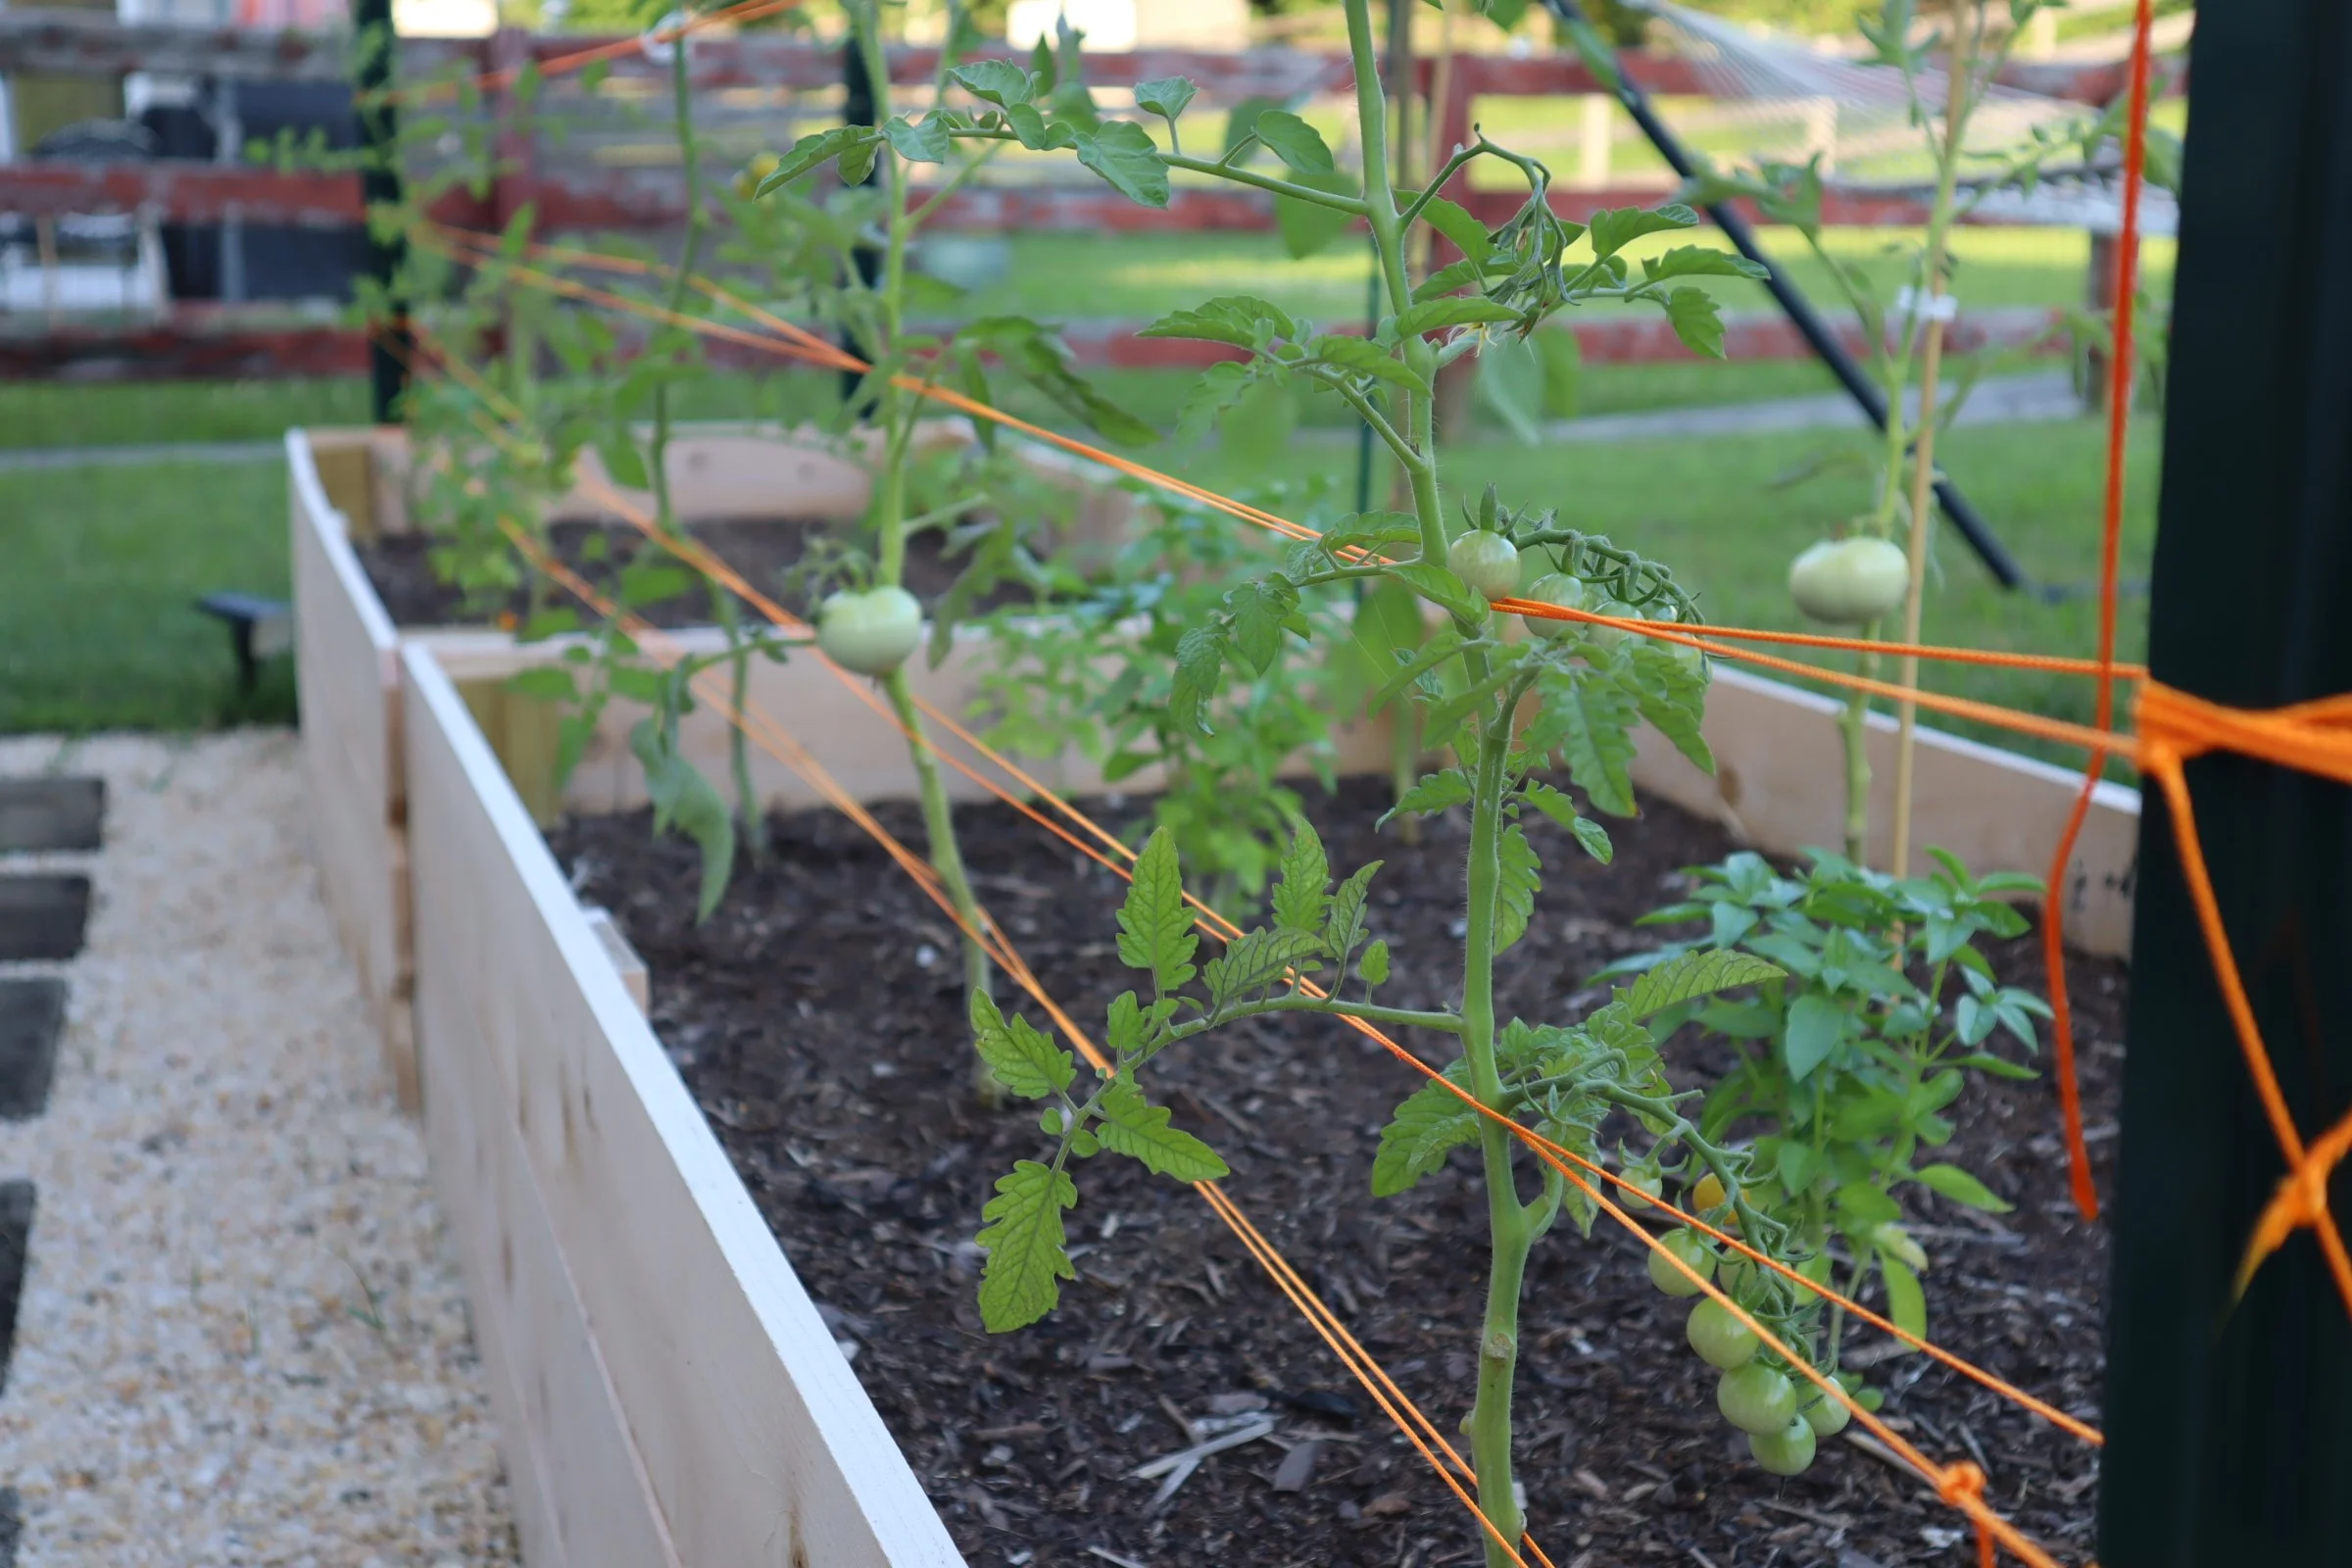
Tomatoes love the sun, so we chose a spot that gets at least 6 to 8 hours of full sunlight each day. The soil in our raised beds was rich and well-draining, and we amended it further with compost and a little organic fertilizer to give the plants a great start.
When planting, we dug deep holes and buried about two-thirds of each plant, including part of the stem. This encourages a strong root system and supports overall plant health.
We also installed tomato cages right at planting time. It’s much easier to do this early before the plants get too big or sprawling, and it prevents accidentally damaging the roots later on. Cages help support the weight of the growing vines and fruit and keep everything tidy and accessible.
Watering and Feeding: Key to Healthy Plants
Tomatoes thrive on deep, consistent watering. Early in the season, we watered every 2–3 days, making sure to soak the soil thoroughly. As temperatures rose and the plants got bigger, we switched to daily watering—especially for our container-grown tomatoes, which dry out faster than raised beds.
Our method? Water deeply in the morning, wait about 15–20 minutes, and then water again. This double-round ensures the water gets all the way down to the deepest roots, not just the top inch of soil.
We also added a slow-release organic fertilizer once flowers began to appear. Tomatoes are heavy feeders, and giving them the nutrients they need at the right time made a noticeable difference in fruit production.
For an extra boost, we used a compost tea every couple of weeks. It’s simple to make and gives the plants a nice hit of beneficial microbes and nutrients.
Pruning and Training
To keep our tomato plants healthy and productive, we regularly pruned off suckers—those little shoots that grow in the junction between the main stem and branches on indeterminate varieties. Removing suckers helps direct the plant’s energy into producing fruit rather than excessive foliage.
We also trimmed off any yellowing or diseased leaves and made sure the base of each plant stayed clear for good air circulation. That helped reduce the risk of common tomato diseases like blight.
Some varieties needed extra support, so we added a few garden stakes and twine ties to help secure the main stems inside the cages.
Pest & Disease Management
We kept pests at bay by planting basil, marigolds, and nasturtiums nearby—classic companion plants for tomatoes that help repel aphids, hornworms, and other pests. We also checked our plants daily for signs of trouble: holes in leaves, drooping, or discoloration.
If a problem popped up, we addressed it right away—whether by removing affected leaves or spraying a homemade insecticidal soap (just water, a drop of dish soap, and a pinch of cayenne for good measure).
Mulching around the base with straw or shredded leaves helped maintain soil moisture and reduce splash-up that can spread disease.
Harvesting Your First Homegrown Tomatoes
Finally, the day came when the first tomato turned from green to a deep, vibrant red. We waited until the fruit was fully colored and just slightly soft to the touch before picking. Gently twisting or snipping them off the vine helped avoid damaging the plant.
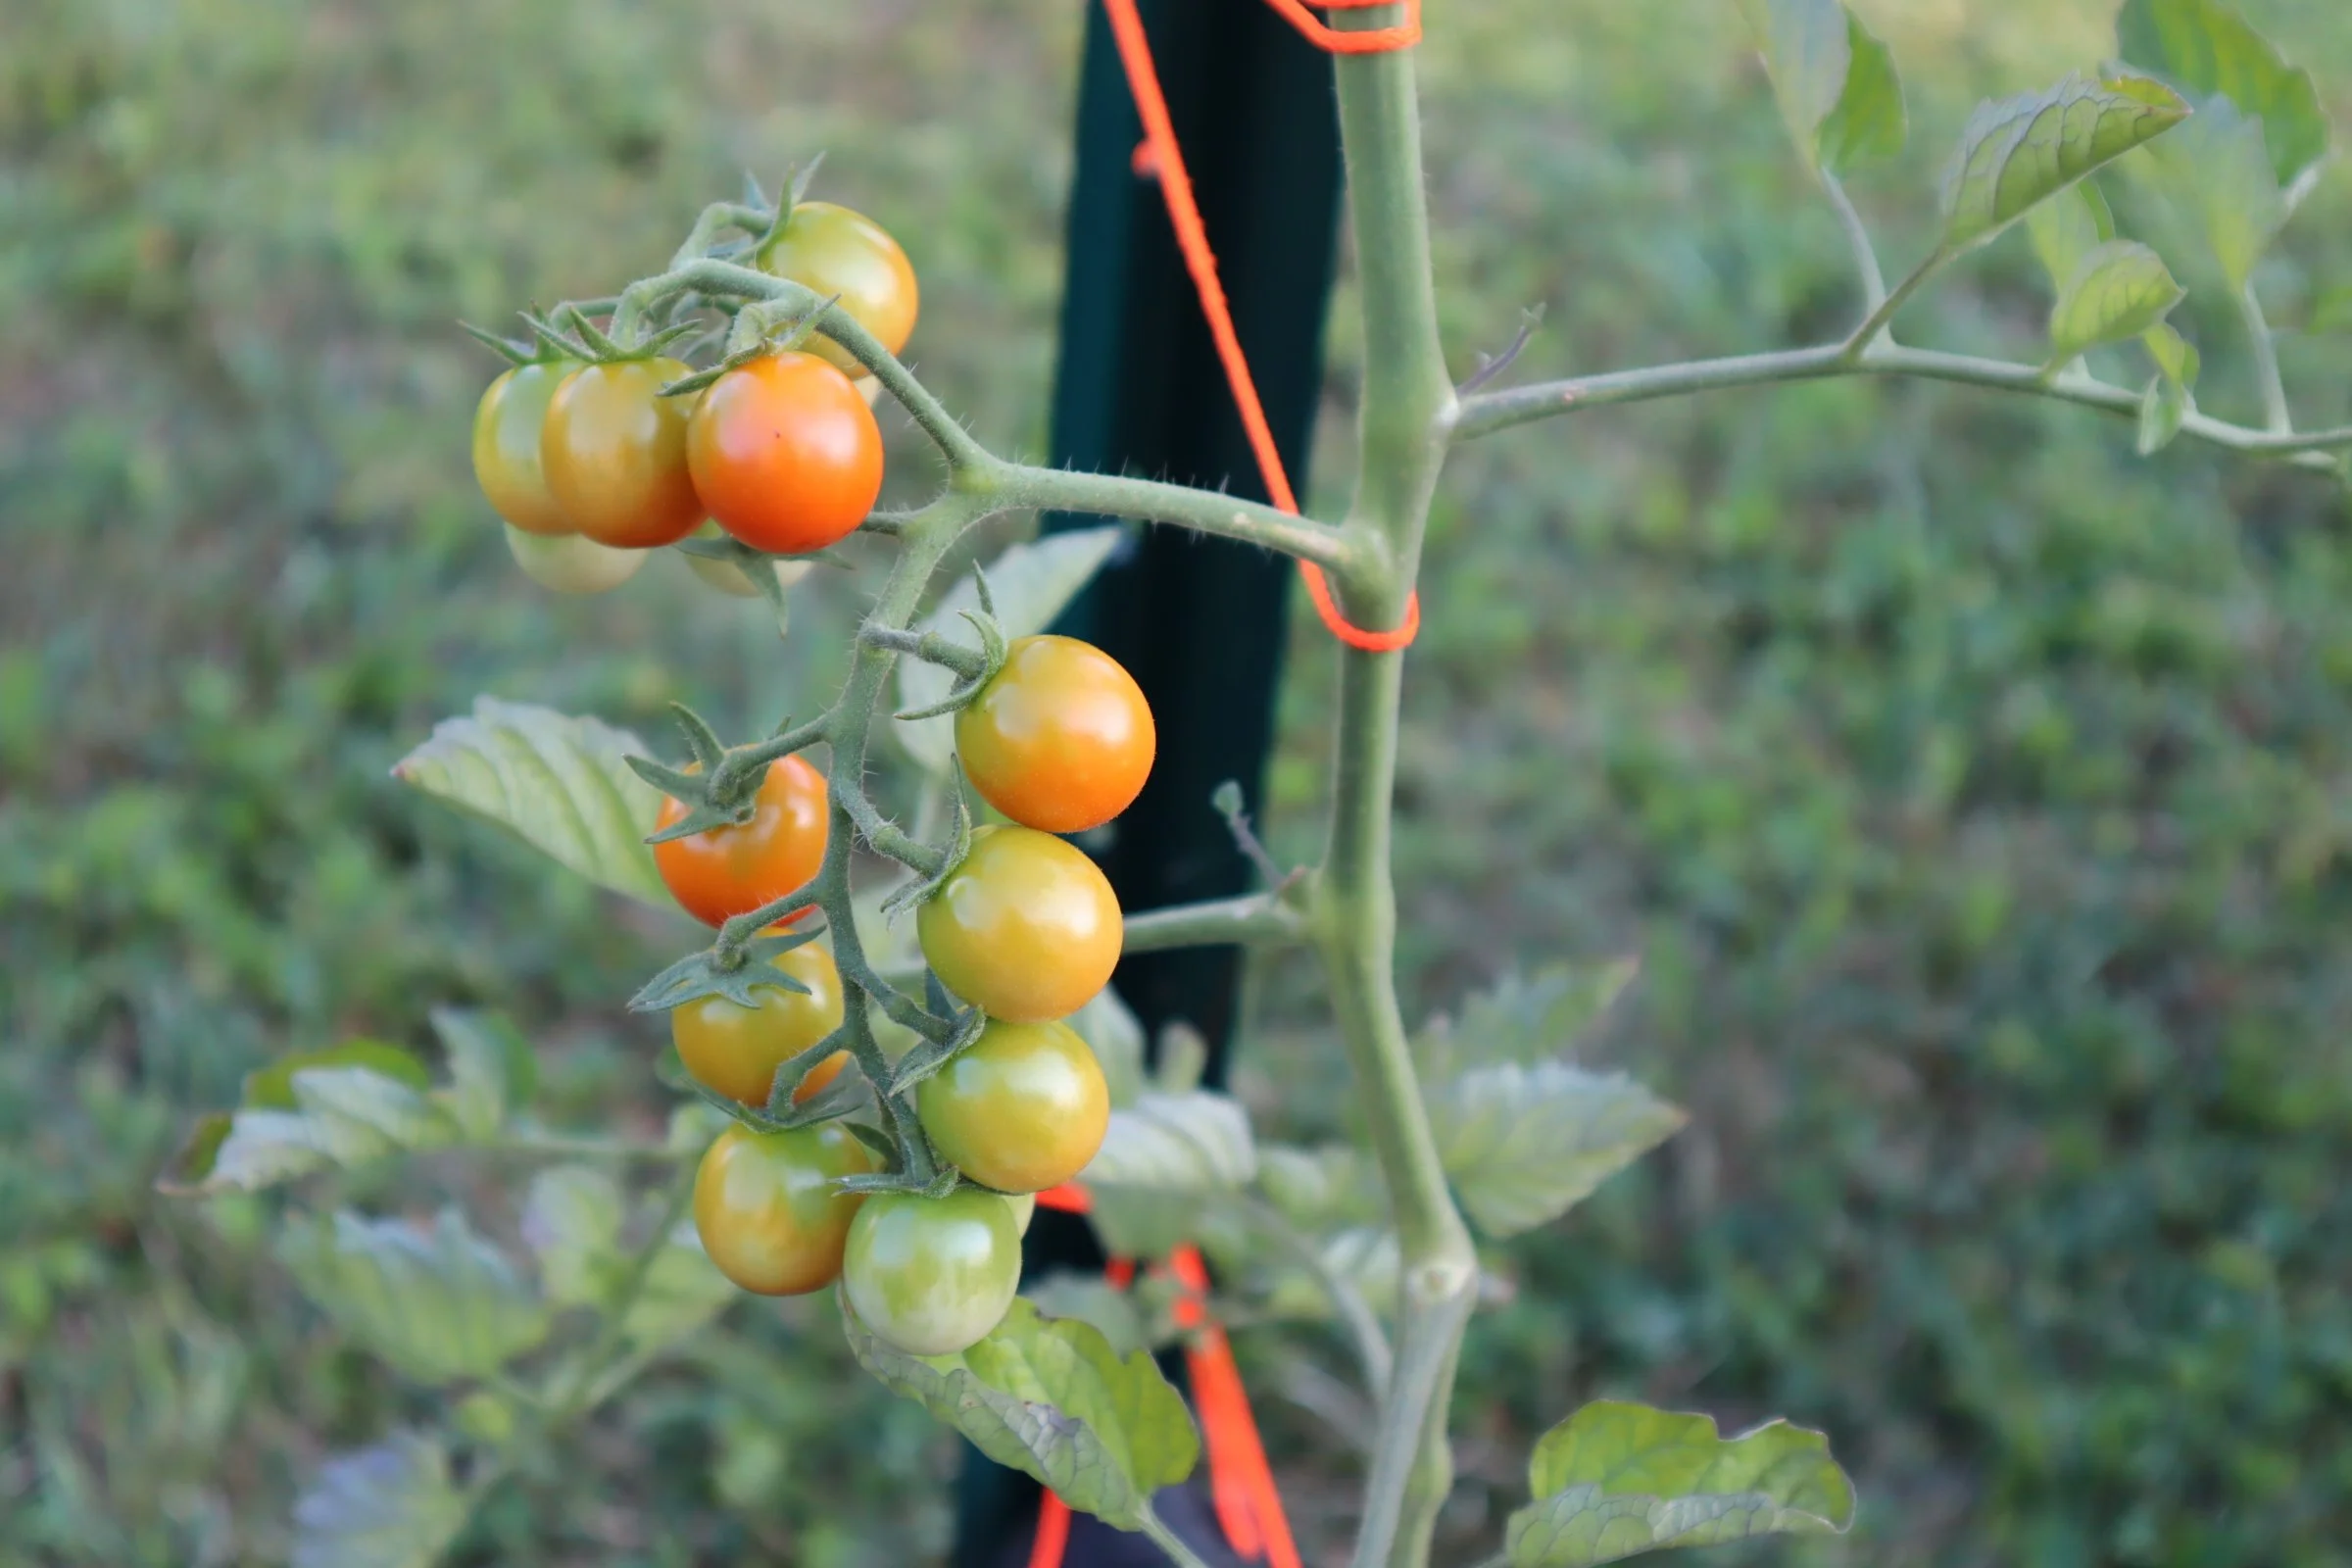
If we had to harvest a little early (to avoid splitting or pest issues), we let the tomatoes ripen indoors on a sunny windowsill. They finished beautifully and still tasted amazing.
One key thing we learned: harvesting regularly keeps the plant producing. During peak season, we checked every day or two and picked any ripe fruit to keep the plant’s energy focused on developing more.
Final Tips for Tomato Growing Success
Rotate your planting spot each year to avoid soil-borne diseases like blight and wilt.
Use containers at least 5 gallons in size if space is limited. They heat up faster, so water more frequently.
Plant companion herbs nearby for natural pest control and added garden beauty.
Mulch well to keep soil moisture consistent and reduce weeds.
Keep track of which varieties you plant and which ones perform best—it helps you plan better for the next season.
Growing tomatoes has been such a satisfying journey for us. From tiny seeds nestled in soil to full-grown plants covered in ripening fruit, every stage is rewarding in its own way. Whether you’re a first-time gardener or adding a few more varieties to your plot this year, we hope our story and tips help make your tomato-growing season a success.
By Leah Ann Grace