
Planting Garlic in the Fall

There’s something special about planting garlic. While most of the garden begins to fade and the air carries that crisp October scent, garlic season quietly begins. It’s the last big planting of the year—a peaceful, hopeful task that bridges one growing season to the next.
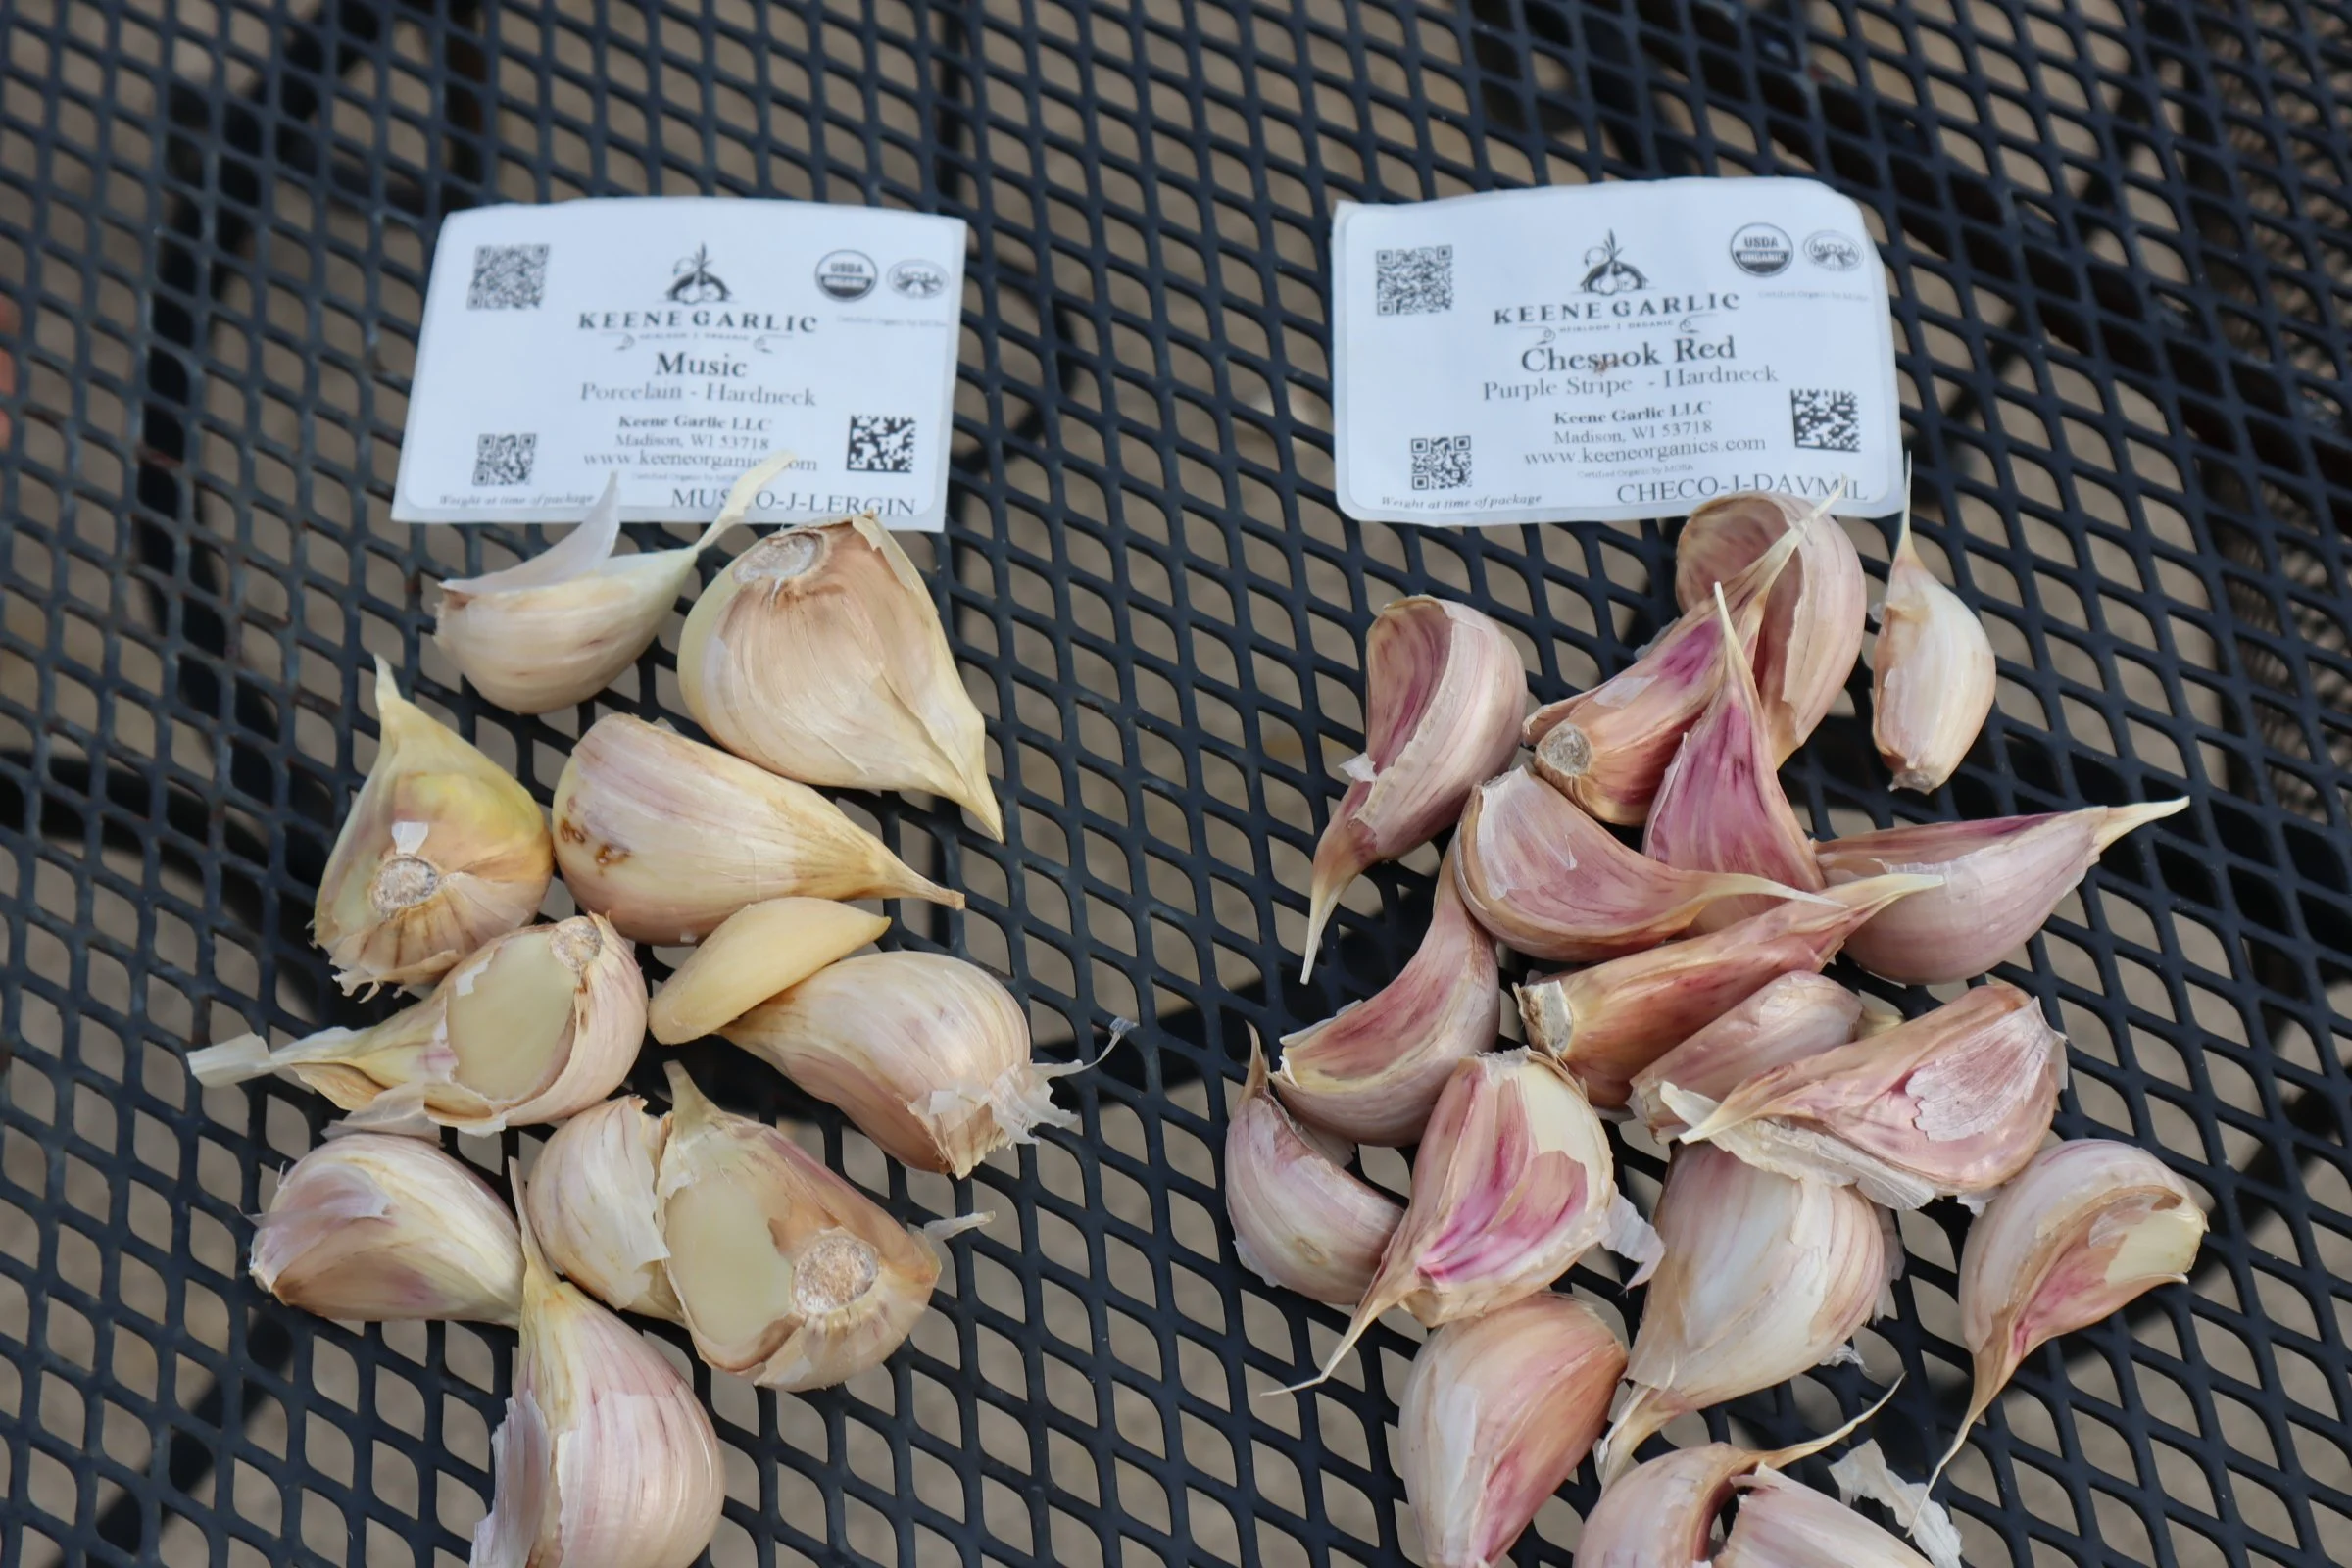
This year, we planted our garlic on October 18th, just as the leaves were turning and the beds were ready for a long winter’s rest. We ordered two beautiful hardneck varieties from Keene Garlic: Music and Chesnok Red. Both are well-loved for their rich flavor and reliability, and we couldn’t wait to get them in the ground.
Following Keene’s directions step by step, we prepared our beds, separated the cloves, and covered everything in a thick blanket of straw. It felt like tucking the garden in for the winter—knowing that beneath the soil, something good was already beginning to grow.
Why Fall Is the Best Time to Plant Garlic
Garlic loves a long growing season, and fall planting gives it exactly that. By putting it in the ground four to six weeks before the soil freezes, the cloves have time to develop strong roots before going dormant for the winter.
Come spring, those early roots give them a head start, producing stronger plants and bigger, more flavorful bulbs by summer harvest. The cold winter temperatures also trigger vernalization—a natural chilling process that helps the bulbs form distinct cloves later on.
Planting in fall means less spring stress, better yields, and a small taste of gardening even as the year winds down.
Choosing Our Garlic Varieties
We decided to try two classic hardneck varieties this year:
Music Garlic: Known for its large, easy-to-peel cloves and a bold, slightly spicy flavor when raw that mellows beautifully when roasted. It’s one of the most dependable hardneck types for colder climates.
Chesnok Red Garlic: A gorgeous purple-striped variety with a sweet, rich flavor that really shines when baked or sautéed. It stores well and adds a pop of color to the harvest basket.
Both varieties thrive in cooler regions and produce those distinctive hardneck “scapes” in early summer—another little bonus for the kitchen.
Step 1: Clove Separation
We started by gently separating the cloves from each garlic bulb, being careful to keep the papery skins intact. This step is simple but important—each clove will grow into its own bulb, so you want to plant only the healthiest ones.
The larger cloves tend to yield the biggest bulbs, so we saved those for planting and set aside the smaller ones for cooking. It’s a little ritual that always feels grounding: hands in the garlic skins, the earthy scent filling the air, each clove holding the promise of next year’s harvest.
Step 2: Spacing and Layout

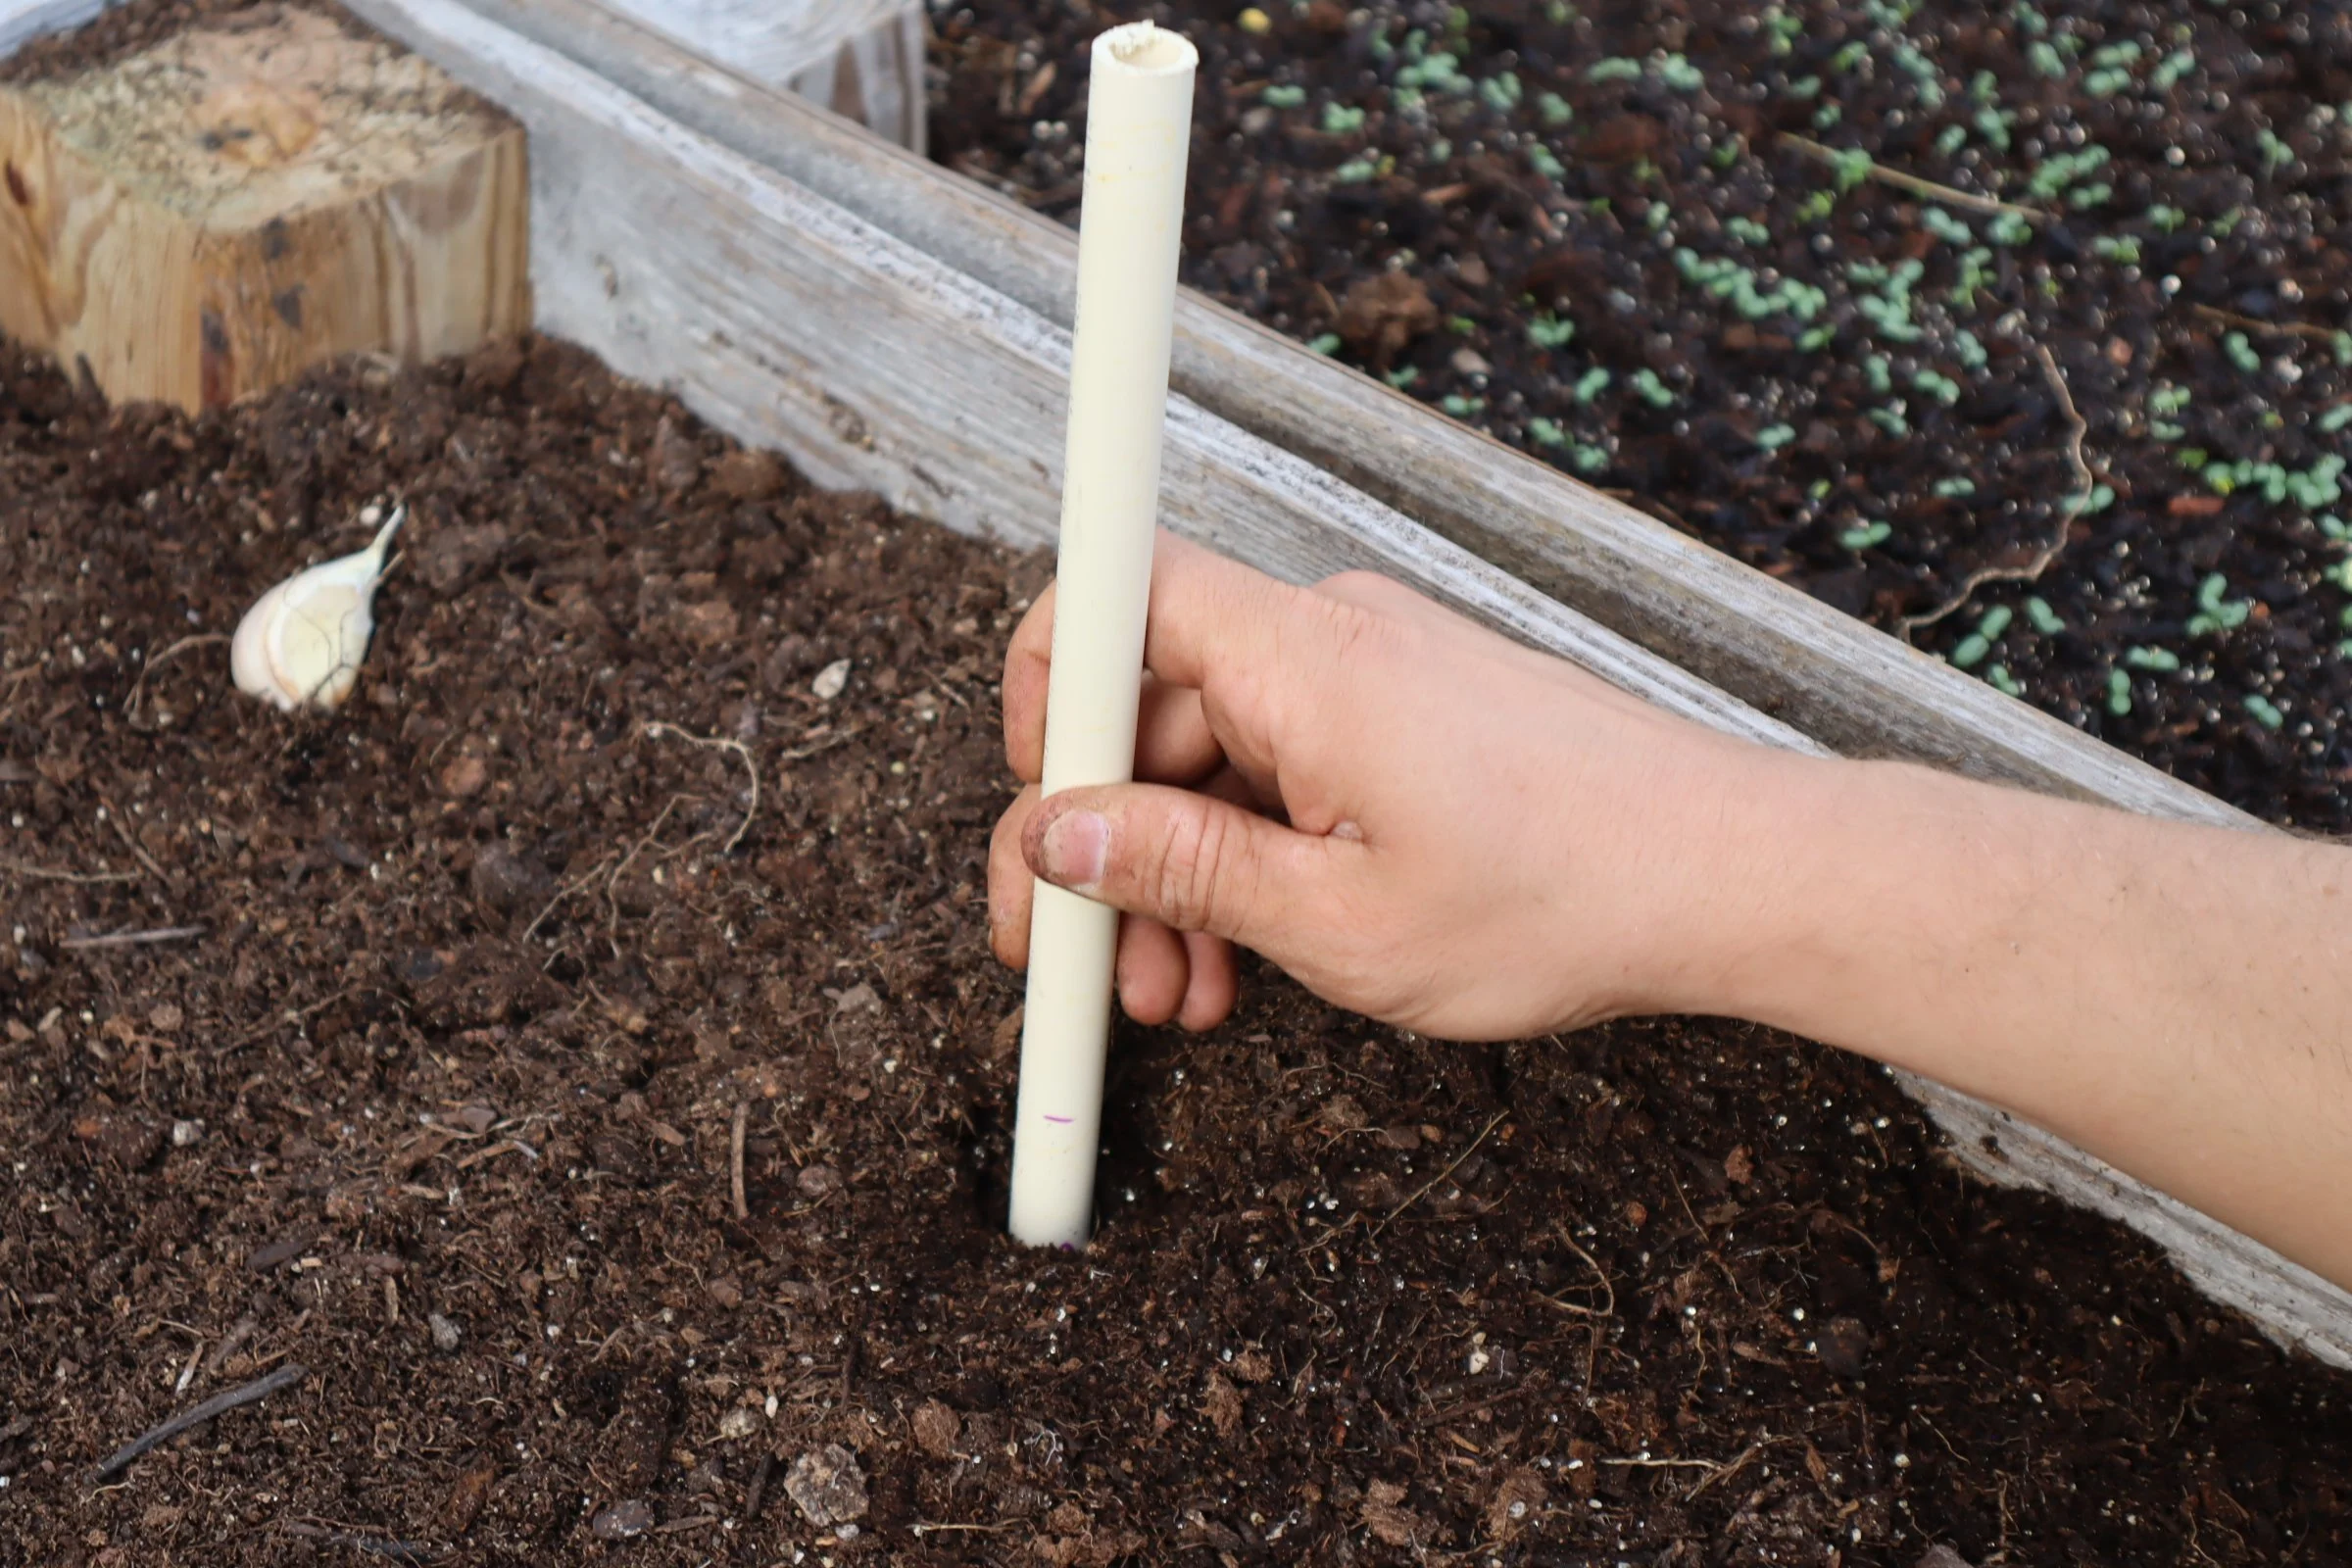
Once our cloves were ready, we laid out the garden bed for planting. Garlic needs space to grow, and 6 inches apart is the ideal distance for most varieties.
To make sure everything stayed even, we used PVC pipe cut to six-inch lengths as simple spacers. It worked perfectly—each clove got its own spot, and the rows turned out satisfyingly neat.
We chose a sunny raised bed with loose, well-draining soil. Garlic doesn’t like to sit in soggy ground, so adding compost and ensuring good drainage makes a big difference.
Step 3: Planting the Cloves
With everything laid out, it was time to plant.
We followed Keene’s recommended depth of 2–3 inches, placing each clove root-side down (the flat end) and pointed tip up. This part is key—if planted upside down, the clove will still try to grow, but it wastes energy correcting itself.
Once in place, we gently covered each clove with about 1 inch of soil, firming it lightly with our hands. It’s such a simple act, but there’s a quiet beauty in it—the kind of slow, mindful work that gardening often invites.
Step 4: Mulch and Moisturize

After planting, we spread a generous layer of straw mulch over the bed. Mulching is essential for garlic—it helps insulate the soil, retain moisture, and protect against temperature swings through winter.
We used clean straw (not hay, which often contains seeds) and spread it about 3–4 inches thick. It looked like a cozy golden blanket over the garden bed.
Finally, we gave everything a good, deep watering. Moisture helps the cloves begin rooting before the first frost. From here, nature does the rest—rain, snow, and time all working quietly underground.
What Happens Over Winter
Once planted and mulched, garlic is one of the lowest-maintenance crops you can grow. Through late fall, the cloves send out roots while the top growth stays minimal. When the ground finally freezes, they go dormant until spring.
In early spring, you’ll start to see green shoots poking through the straw—one of the first signs that the garden is waking up. It’s a joyful sight every year, a small reminder that the cycle continues even through the quiet months.
Tips for Growing Healthy Garlic
1. Rotate Your Beds: Avoid planting garlic in the same spot two years in a row. Crop rotation helps prevent diseases like white rot and keeps your soil balanced.
2. Feed the Soil: Garlic loves nutrient-rich soil. Mix compost or aged manure into your bed before planting to give it a boost that will carry through the growing season.
3. Water Wisely: Garlic doesn’t like to stay too wet. In spring, water deeply once a week, but let the soil dry slightly between waterings to prevent rot.
4. Enjoy the Scapes: In early summer, hardneck garlic varieties like Music and Chesnok Red produce curly green stalks called scapes. Snip them off when they curl for the best flavor—they’re delicious sautéed, blended into pesto, or tossed into stir-fries.
5. Harvest on Time: Garlic is ready to harvest when the lower leaves have browned but 4–5 green ones remain. This usually happens in mid-to-late summer, depending on your region.
Reflections from the Garden
There’s a certain rhythm to fall gardening that feels slower, more intentional. Planting garlic is one of those moments that ties the seasons together—it’s both an ending and a beginning.
This year, as we planted our Music and Chesnok Red cloves, the sun was low, the air cool, and the garden calm. The soil still held warmth from the season, and each clove we pressed into the earth felt like a small act of faith.
When you plant garlic, you’re really planting for the future—for long, fragrant summer days when you’ll pull the bulbs from the ground, brush off the soil, and hang them to cure. You’ll slice them into sauces, roast them with vegetables, and remember that it all began on a quiet October afternoon.
Gardening has a way of reminding us that good things take time. Garlic, perhaps more than any crop, teaches patience—the kind that rewards you not right away, but later, with flavor that’s worth the wait.
Final Thoughts
If you’ve never tried planting garlic before, fall is the perfect time to begin. The process is simple, the care minimal, and the reward extraordinary.
All you need are healthy seed bulbs, some compost-rich soil, and a little straw. Follow the steps—separate the cloves, space them six inches apart, plant 2–3 inches deep, mulch well, and water—and then let nature take it from there.
As the garden winds down for the season, planting garlic is like leaving one last note of hope in the soil. It’s a promise that even through the stillness of winter, life continues to grow unseen.
Come next summer, when you lift those first bulbs of Music and Chesnok Red from the ground, you’ll taste the quiet patience of autumn—and the simple joy of knowing you grew it yourself.
By Leah Ann Grace